After going through different tools, decided on Capture One Pro. Next step is coming up with a best practice organization that suits my needs, along with backup strategy.
Honestly I feel it is so archaic in 2016 to physically insert SD card to transfer images and manually need to type in keywords. It should be like iPhone and Photos (or Google cloud).You should just take photos in a camera like on iPhone and they should be automatically uploaded into cloud, all other designated devices, sorted based on location and time, and grouped some what like collection and moments, and to share.
Unfortunately our cameras are not as networked as our phones, here is a process I came up with.
My storage and orgnaization methodology has to accommodate following assumptions.
Definitely will
- Run out of space
- Need to find one particular image out of 30 thousand + images
- Need to view/edit images in multiple devices
- Delete items that I will need soon after
- Not enter lot of useful information during import
Need to be prepared for
- Hard disk crash,
- Offline storage to protect agains ransomware, virus attack, etc.
Few Conventions
- “Backup” naming to be used only for files, library that needs to be restored from but never to be directly edited.
- Only one working copy of the Raw file,
- Not to rename files during import, so as not to rely in file name to have any intelligence. As I can’t consistently do it for all my files, rename at the time of jpeg export
- Not to use date as part of the project name, may be the year. As all the images have timestamp in them, the tools can much easily filter them. When going through names it is much easier to look inside Christmas ’07 than two folders 2007-12-24 and 2007-12-25
- Before deleting any image make sure there is backup in different drive.
Caution: Try the steps with a smaller library say <10GB with 1000-2000 images.
Step 1: Backup all existing images
Got a 4 disk NAS, though using only two for now, the additional two disk for easy future expansion. Using Raid 1, if not has to manually copy the images into two.
Classified images into three category
- My Images that I want to keep, should be accessible readily.
- Images that I shot for others, may be accessed once in couple of years, can delete most of them.
- Images mainly for testing, probably will never access again, all can be deleted.
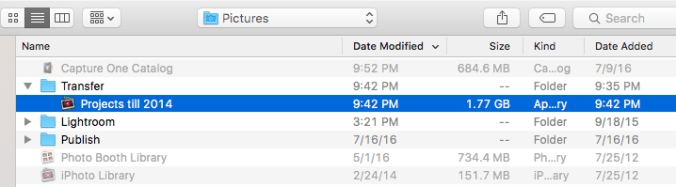
Before deleting I calculated the cost of storage. With 4TB drive just around $130, even with 50MB images, 10,000 images is just 500GB. So the idea is to keep al images as backup, but only in external drive, so that they are not getting in a way of daily usage. So kept the images in three folders, (The word Backup is used to indicate that the working copy is somewhere else, and its just backup to be used only for restoration).
- Master Backup (Backup, with working copy in main computer)
- Friends and Family ( Not part of main disk)
- Test Images ( Not part of main disk)
Tips & Tricks
- Moving or Copying the Aperture Library to NAS took really long time, but Exporting Projects as library as much quicker.
- This also freed up many GB’s of cache that was still in the older Library.
- After that verified the size of Master ( Control Click Aperture Library -> Show package contents -> Master -> Show Information)

Step 2: Importing Existing Images into Capture One catalog
Few of the excellent resources are
1) Lynda.com course from Derrick Story , the good part the content is organized and catalogued really well, so can jump to the section as needed.
2) Capture One You tube Webinar
3) Blogs from Rockynook and his eBook
After going through many Pro’s and Con’s decided to keep at least all imported images outside of Capture One Catalog, mainly to keep the catalog in SSD and easily copy the catalog between iMac and Macbook if needed.
Did little bit of cleanup in Aperture before coming here. Here are some cleanup step
Cleaning Up Aperture Library Before Import
- Organize Projects by Years, idea is not to keep more than 20 projects in year. Grouped the all dated ones into broad Winter, Spring , Summer, Fall category e.g. (Fall ’06) Then named as many events as possible like Oslo, Arizona, Hawaii , Local trips
- Quickly remove obvious images, like rejected, empty trash,etc. as the master is already backed up.
- Consolidate all images from all sources (Library-> Photos->(Cmd-A) to select all , File->Consolidate -> Move), not needed if they are already referenced.
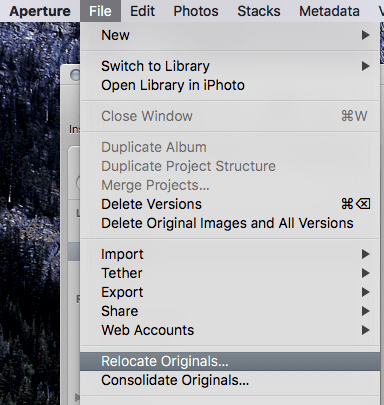

- Relocate the Original again to “Image Master” folder , main reason being instead of Capture one folder view looking like some numbers.. , it will have some meaningful name. ( Don’t start this in day time , do it before going to bed, and like magic it will be done in the morning! 🙂 )

- Since they are referenced , if the images are accidentally moved within Capture One, the files can be easily moved for later use in Aperture. Also any change in Aperture can easily be understood for updating in Capture One.
Exporting Projects for Import
- This step could be avoided the images could directly be imported, but I kind of wanted to split the library in few chunks, so selected about 20 projects exported them and imported them to make sure everything came as expected.
- Note : Unchecked the Option for Copy Original and Copy Previews, as the images will be referenced and the previews will be generated again in Capture One.

- Similar imported rest of the projects from Aperture
- This made the size of import library very manageable, the original size of Aperture Library was ~220GB, Relocating all original images reduced the size to around ~54GB, and the final libraries for Import came around 12GB. This still had all the images, adjustments, ratings and everything in place
Step 3: Import Projects Into Capture One
Now is the easy step, just import catalog and select the Aperture Library.
- All Aperture Projects came as Alubms, and they were under Project with a same name.
- My Crops, Adjustments, Ratings everything seems to be in place, except for few missing adjustments like Vignette. White Balance.,
- Nothing to worry, as all my images are exactly the same way in Aperture and Aperture still works great.
Step 4: Import New Projects
- Made just couple of tweaks after inserting Memory Card
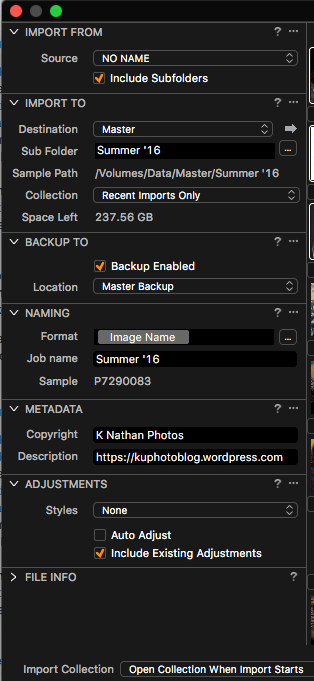
- Destination I kept the same as the Master file I had in Aperture
- Changed the Sub Folder name
- Gave a Job name the same
- Made Backup Enabled and gave the backup location
- Quickly deselected few obvious ones I don’t want it , and imported the rest.
Step 5: Verification
- Compared many of the folders, libraries in Aperture and check if they are here as well.
- Made few adjustments to images imported from Aperture, Opened the existing Aperture library to make sure everything is in order
- Verified files are in working Master location and Backup Location,

Next step is to do some organization practice with in Capture One.
