With E-M1 Mark ii, I started shooting my usual indoor images with the f/2.8 zooms. With 25% larger image size I was not expecting much difference in low light. But to my surprise the indoor images started looking much better and no blinking low exposure warning sign. When I looked at the details the default high limit is ISO 6400, which was increased from ISO 1600. And they do indeed produce much nicer image.
One thing the below test may not show is the much improved jpeg engine with E-M5 mark ii, which produces much better results than E-M1. This is kind of like how iPhone processing makes an image appear much better than it is.
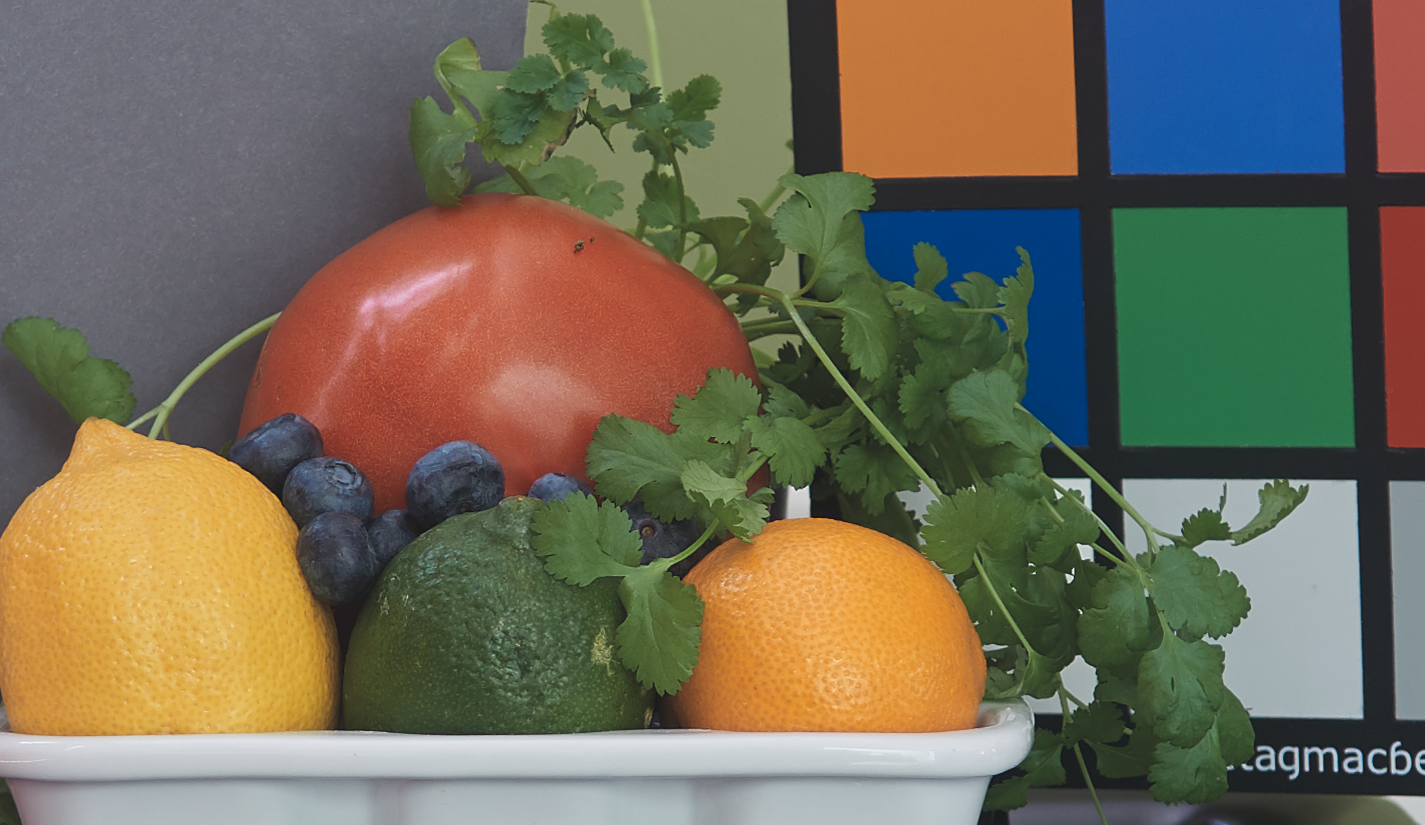
Natural Subject with Primary Colors
Main purpose was to test the color matching of camera to my new printer. I wanted to use natural subjects and with the primary colors. That way I can compare the result in the monitor with the real subject in front of me and check the print colors with the actual colors. So I ended up with following things from pantry…
- Red Tomato ( It’s not that yellowish, orange with light red).
- Geen Lime , It’s a dark green lime
- Blueberries , I don’t think they come in different shades, dark blackish blue.
- Yellow Lemon, Bright yellow lemon
- Orange clementine
- Live Cilantro plant
- Grey sheet and Macbeth color chart to match white balance. The charts are not exposed properly, so they might appear darker then the actual color might represent.
Lens : 25mm f/1.4, at f/2.8
Location : Dark shade inside house in a cloudy day. Just to give a reference.. this is the iPhone photo.
-
- E-M5 Mark ii at 100%
-
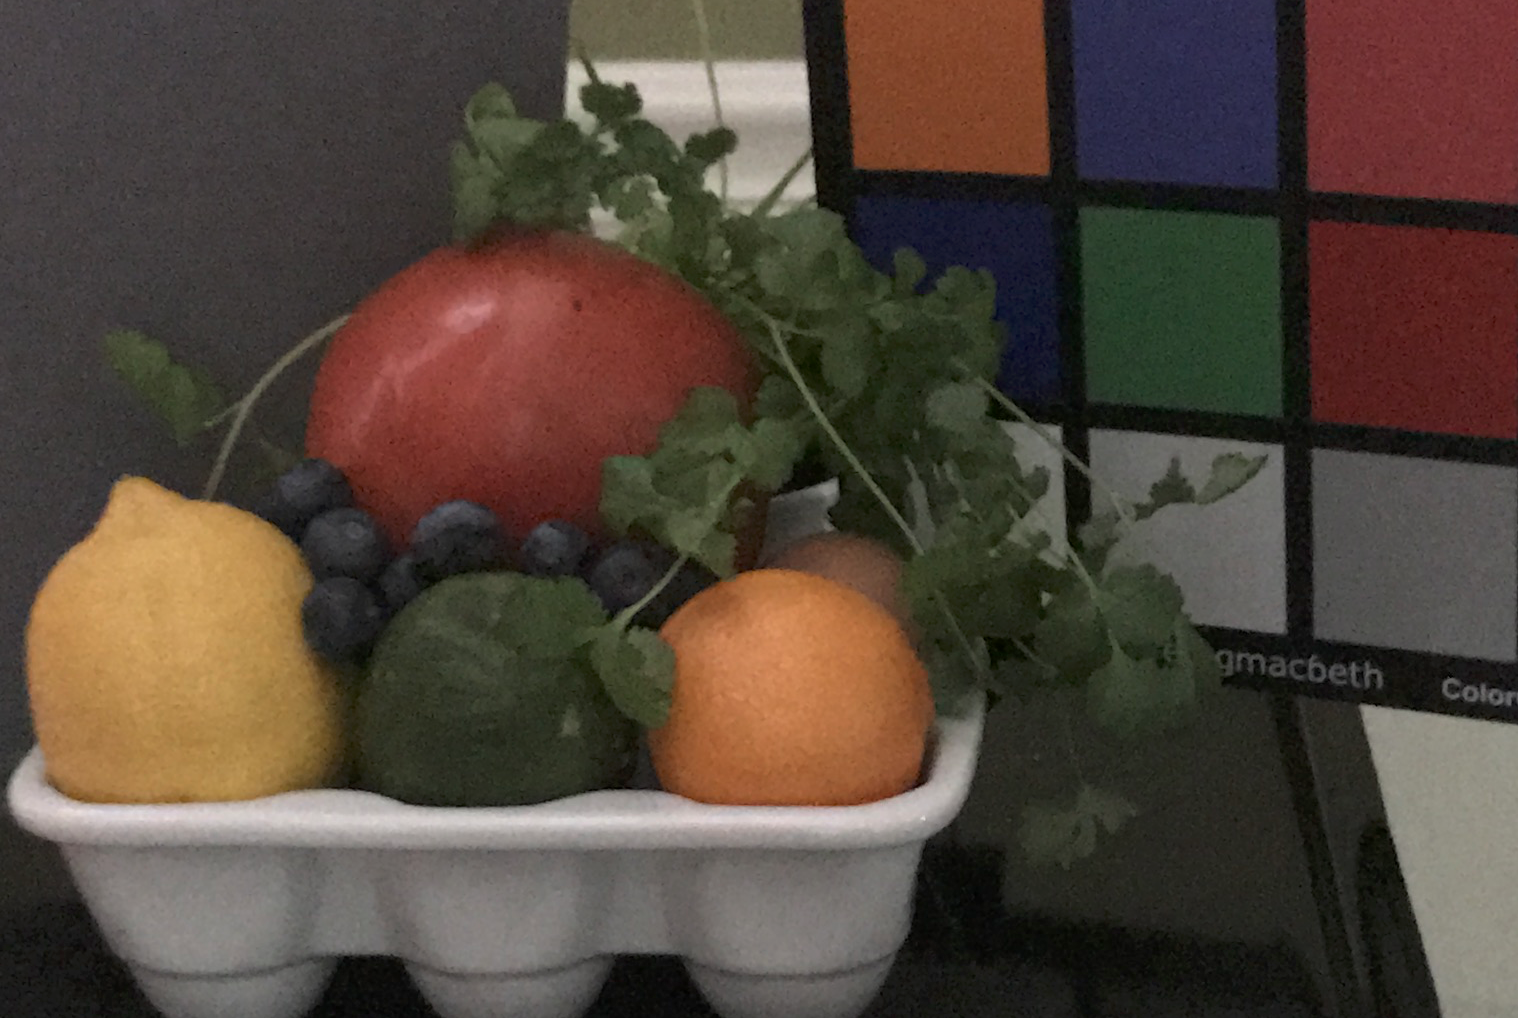
- iPhone Photo at 100%
iPhone metered this around ISO 640, f/1.8 and 1/4s, which gives.. EV100 value of 1, with the Goosen meter I got a value of zero, which is like “Subjects lit by dim ambient artificial light”.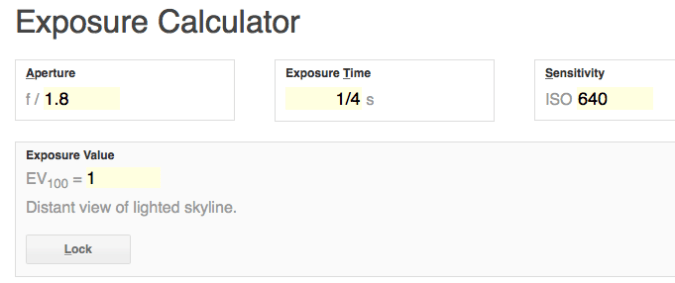
Now to the actual comparison with the E-M5
ISO 64, Super clean image in near dark shadow. 
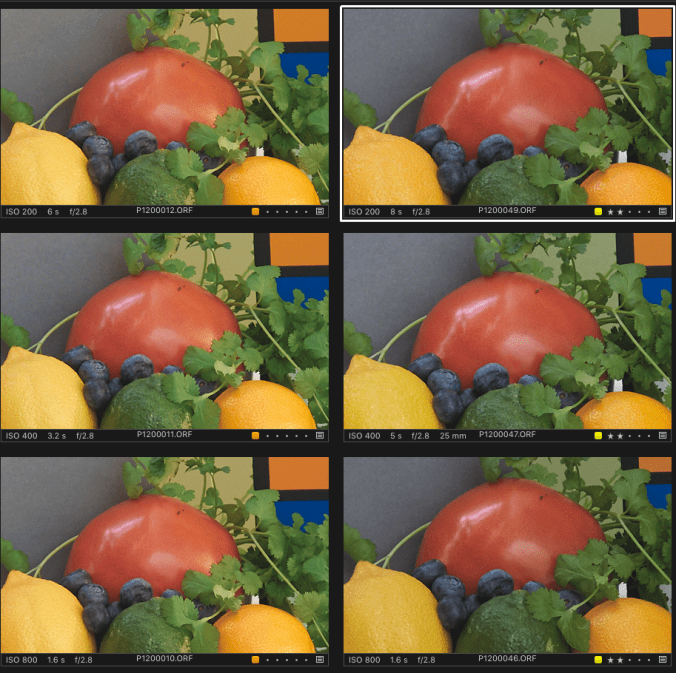
ISO 200 to 800
The Capture One and the E-M1 LCD screens slightly shift the hues of red towards magenta, Getting the white balance right almost fixed it, still a slight shift of Tint was needed in Capture One. ACR didn’t have this issue. Though default setting produced better looking tomato, I opted for color of tomato which I was holding in my hand.
Other thing you may not see in the screen shot is richer shadows, If you look at the blueberries, they have the natural blue tint compared to the black tint with E-M5.
First thing I noticed there is absolutely no penalty in going from 16MP to 20MP. This was my issue with D800E, I felt D700 performed better with ISO. Of course that’s different line and 300% jump in pixels. Now back to the comparison, E-M1 started retaining details better than E-M5 as we go up in ISO. If you notice too closely, the lemon started loosing details little bit in the left side with E-M5, but with E-M1 mark ii, i didn’t have that issue.
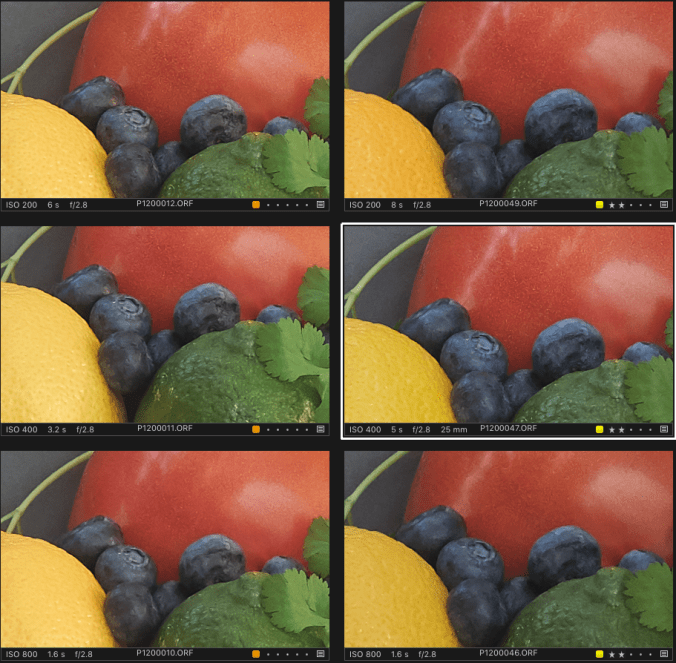
Images on the right with ‘**’ are from E-M1 mark ii
Here are all the images from ISO 200 to 800


Here is 50% view..
Images on the right with ‘**’ are from E-M1 mark ii
ISO 1600 to 64000
Till 6400 , EM-1 mark ii retains the color accuracy well. For me that’s more important then the noise.
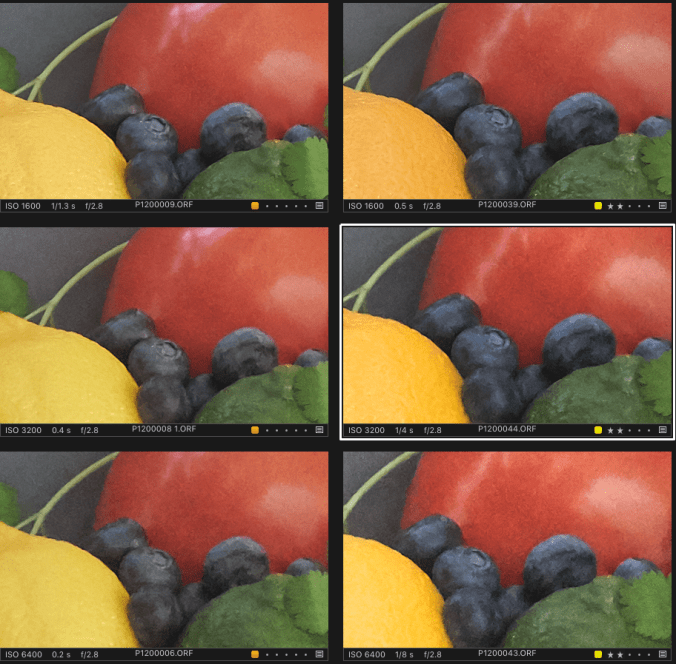
Images on the right with ‘**’ are from E-M1 mark ii


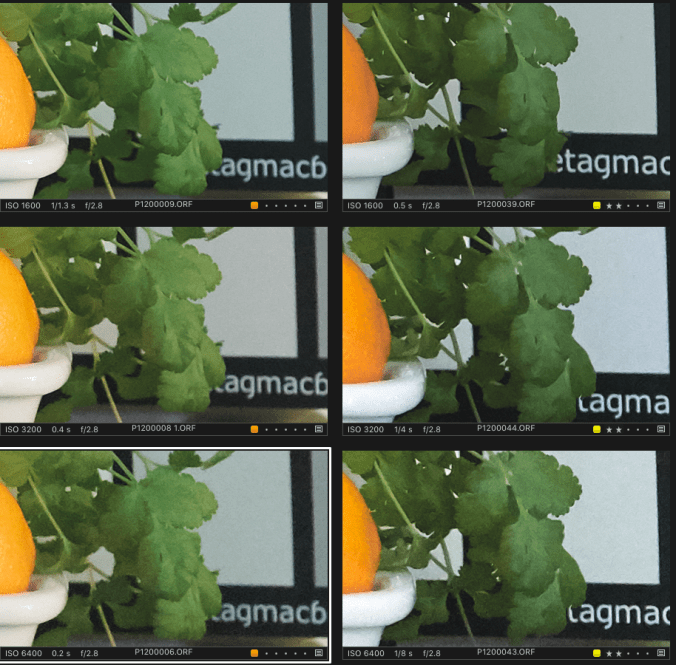
ISO 8000 and up…
Not only E-M1 mark ii has 25% more pixels, it shows less noise than the previous generation.


Images on the right with ‘**’ are from E-M1 mark ii
Next Part…
The main purpose of the test was to do a print accuracy of colors for different ISO, and the maximum size I can print the images, but that part will be in the next blog with in few days. And hopefully will do review of comparison with full frame sensor as well.
Conclusion
The comparison with E-M5 shows that Micro Four Third sensor size shouldn’t be judged with out using E-M1 mark ii first.

Pingback: E-M1 mark ii ISO Comparison with E-M5 handheld | K Nathan's Photo Blog
Pingback: E-M1 Mark ii – Printing with Epson P800 and various ISO | K Nathan's Photo Blog